Step: 1 Tile Selection
The first step in preparing for backsplash tile installation is selecting the right kind of tiles for your space. The space above the countertop in the kitchen is limited and thus while selecting the tiles one should keep this space in mind. It is advisable that you measure the kitchen before selecting and ordering tiles for kitchen backsplash. As the wall tiles form a grid-like pattern in the narrow space above the countertop, try and choose tiles which form a vertically even and symmetrical pattern on the walls. Another important decision while selecting the wall tiles is the material of the tiles. You can dwell on the three popular material types while contemplating the backsplash patterns.
You can consider one of the below-given kitchen tiling ideas:
Ceramic and Porcelain tiles are the most commonly used tiles for kitchen installations. Ceramic tiles are available in various styles, sizes, color and offer a range of price points. In addition to being versatile, they are also super easy to clean and maintain because of their glossy surface. Ceramic tiles are your go to if you are looking for easy, maintenance free yet aesthetically appealing kitchen backsplash.
Glass panels are great if you are aiming for minimalistic modern kitchen décor. Glass is coated with color on the side that contacts the wall. This gives a seamless modern look to the kitchen and is easy to clean owing to the lack of grout lines and its glossy surface. Glass tiles backsplash will also make your kitchen look brighter as glass has the tendency to reflect light. Glass tiles would be a great kitchen backsplash idea if you have a small modern kitchen.
- Natural Stone Tiles or Slabs
It is hard to beat the beauty of nature and stone slab options of granite and marble offer the feel of natural beauty in your kitchen. Granite or marble is used as a countertop option in many kitchens. Going for the same stone backsplash will give a cohesive feel to your kitchen. Stonewall tiles are available in a range of size and price options. Stone tiles too reduce the number of grout lines and are easy to clean owing to their polished shiny surface.
You can select the best tiling alternative when you are considering installing backsplash in your kitchen. I case you are changing the backsplash we would suggest that you opt for a different alternative than the one you had because backsplash has the ability to completely change the look and vibe of your kitchen without making any drastic changes.
Step: 2 Prepare your Walls
Once you are done with the selection of your kitchen backsplash it is time to start preparing your kitchen for seamless tiles installation. To be installation ready, prep your kitchen by taking the following steps:
- Turn off the power to the kitchen. Once the power is off, remove all the outlet covers and switch plates in the kitchen area. Seal all the open outlets with tape to keep them safe from materials being used during the tile installation.
- Tape all the countertops, cabinets and kitchen furniture to keep it safe from tile debris and glue.
- Remove or distance all the free-standing kitchen appliances like a stove, hot plate, coffee maker from the wall.
- Once the walls are free of all the appliances wash the walls using mild soap and water. Check the wall behind the stove for oil and grease stains. If you find any, use a degreaser or a primer to get rid of the oils stains.
- For easy installation of backsplash, painted kitchen walls need to be washed with tri-sodium phosphate and sanded properly to de-gloss them.
• A tile backsplash can only be applied over clean, even surfaced, drywall. So once your kitchen walls are sanded and de-glossed check them for any uneven surfaces like cracks or bumps and seal these surfaces with a joint compound and let it dry.
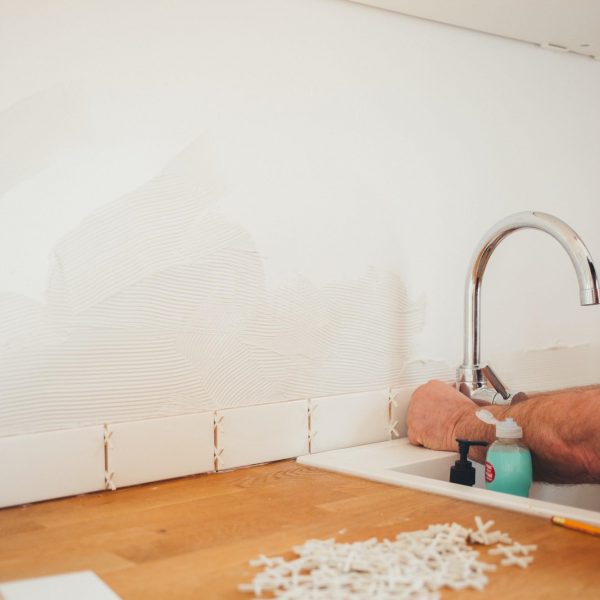
Step: 3 Pre-Lay the Tiles
Your walls are now ready for the next step of backsplash installation.
- Pre-lay the tiles on the wall and mark your start and end points. Your starting point should depend on the most viewable area of the backsplash.
- From the start point, work your way upward and outward till you reach the end of the wall. A straight and level edge will help you keep the tiles even.
- Depending on your tile selection you may need to cut the tiles to fit the backsplash area properly.
- Ceramic and Porcelain tiles can be cut by using a manual snap cutter. The cut tiles will have rough edges; you can use a sending stone to smoothen them. For glass tiles and natural stone use a wet saw, this will help get precisely cut tiles with smooth edges. Also cut tiles for electrical outlets, sink tap, pipes, and other obstructions. You can also use a power drill with a tile-hole saw, an angle grinder with a diamond-grit blade, or a hacksaw or file with a carborundum blade when cutting tiles for objects that are obstructing your backsplash.
Step 4: Lay the tiles
You now have a perfect backsplash layout for your kitchen with a set pattern and tiles cut according to your backsplash needs. The next step is to lay the tiles.
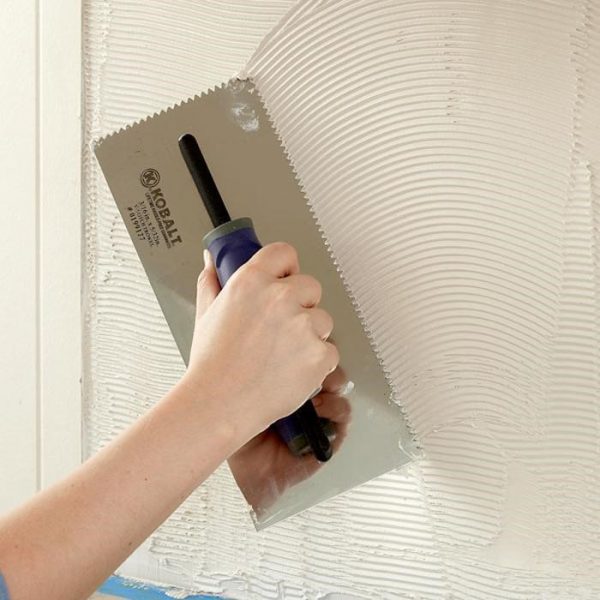
- Wall tiles adhesive comes in a powder form. Mix the adhesive according to the directions. Once the adhesive is ready, spread the adhesive on a small section of the wall. Apply the adhesive with the flat section of the trowel. For the adhesive to fully adhere to the wall, press the adhesive at 45-degree angle.
- Now using the notched trowel apply little more adhesive to the wall and comb even ridges unidirectional ridges. Make sure that you are using the right kind of notched trowel corresponding to the tiles you have selected.
- Use a white adhesive for glass panels or tiles as the adhesive may show through them.
Tip: Work in 2 feet by 2 feet or smaller sections to prevent the adhesive from drying or forming a skin while you are laying the backsplash. Clean the excess adhesive off the face of the tiles by using a sponge.
- Now that you have applied the adhesive to the wall place the tile along the wall. Begin with the bottom row of the tiles at the center mark. Press the tile firmly into place and place the tile spacers to help to keep the tiles line up. Avoid squeezing the adhesive around the joints.
- When the first row is complete move towards the second row. Move upwards on completing each row of tiling.
- Periodically review your work to ensure that all the tiles are firmly placed and they are forming even horizontal and vertical grout lines. Use a straightedge to ensure that the rows are even.
- If you are tiling in a small area where you cannot use the trowel, apply the adhesive on the back of the tile and firmly place the tile on the wall. This technique is known as ‘back buttering’.
- Once you have completed tiling your entire backsplash, admire your hard work and let the tiles sit for 24 hours or as per the adhesive manufacturer guideline to dry and set properly.
Tip: While tiling the focus areas of the kitchen, make sure that the cut tiles are placed in shadows like just below the cabinet or towards the edges of the area like towards the wall. This will make your backsplash look attractive and professionally done.
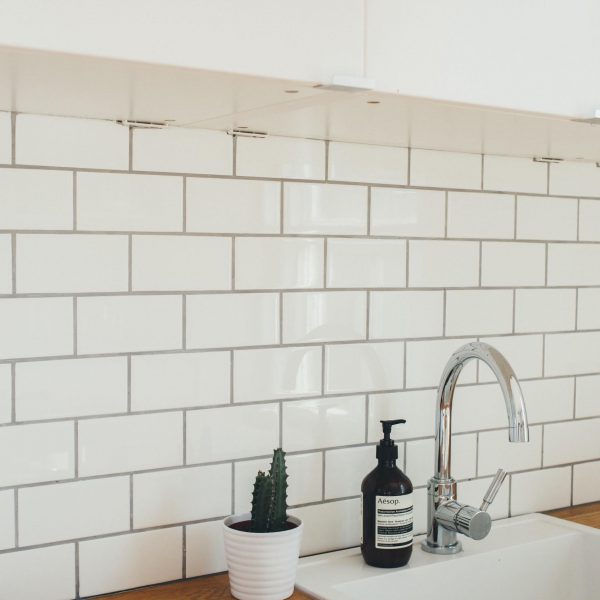
Step: 5 Apply the Grout
Once the adhesive is dry and the tiles are set, your backsplash is ready for the final step of the installation process.
- The final step in the process is applying the grout to seal the gap between tiles.
- Unsanded grout is used for wall installation with narrow grout lines and sanded grout is used for wall installation which a gap wider than 1/8 inch.
- Wipe your tiles clean before applying grout and remove the plastic spacers.
- To avoid grout staining or sticking on porous natural tiles like stone tiles, check with your tiles distributor beforehand if they require a commercial sealer. If a sealer is required apply it 3 to 4 hours prior to applying the grout.
- Mix the grout power thoroughly as per the manufacturer direction. Pre-mix grout are also available in various colors to match or contrast your installation.
- You will have limited time to work on applying the grout once your grout mixture is ready. Just like tiling work in smaller sections to thoroughly apply the grout and to finish the work on time.
- Apply the grout by holding the grout float at 45-degree angle. Work diagonally in small patches and apply thoroughly without missing any sections of the backsplash. Remove the excess grout by holding the grout float at 90-degrees.
- Allow the grout to set for 10 minutes.
- Do not grout the bottom seam of the tiles which meet the kitchen counter. You will have to caulk this.
- Once the grout is set, use a wet sponge to wipe off the grout from the face of the tile. Move the sponge in circular motions over the tiles to remove the excess grout. Grout is meant to fill the gaps between the tiles, thus do not wet the grout in the tile joints as it may weaken the grout. Rinse the sponge often for best results.
- Repeat this several times to get completely rid of the excess grout.
- After 3 hours you can remove the last haze of the grout from the face of the tiles. Use a damp cheesecloth or a sponge to wipe down the tiles for the last time.
- It usually takes 24 hours to 3 days for the grout to dry completely. Once the grout is completely dry you can apply grout sealer to protect your kitchen backsplash from staining. After the sealer is dry you can caulk the bottom seam of your backsplash by using latex caulk.
- Complete the backsplash installation by mounting all your kitchen receptacles. All your electrical sockets and switch plates once again go back to their original places. You will probably need longer screws to account for the increased thickness.
• This is the last step in installing the kitchen backsplash.
Installing kitchen backsplash is a good DIY project for any homeowner and is also a great investment. Your backsplash is all installed, can now admire your handy work and look forward to spending cozy evenings in your kitchen entertaining guests, sipping wine, cooking and enjoying your home-cooked meal.
If you don’t have all the necessary tools to take on this project or you may have started and encountered many obstacles, don’t sweat it, we are here to help. We have over 10 years of experience working on such projects. No job is too big or too small for Belissimo Colors. Simply give us a call or leave a message and we will be happy to do it for you.